Making parabolic ambient light texture map technique and theory. Part-1
How to making parabolic ambient light map lookup texture when I using 3dsmax?
I'm sure that is too much pre easy.
This technique is really some tweaking by parabolic reflection uv coordinate.
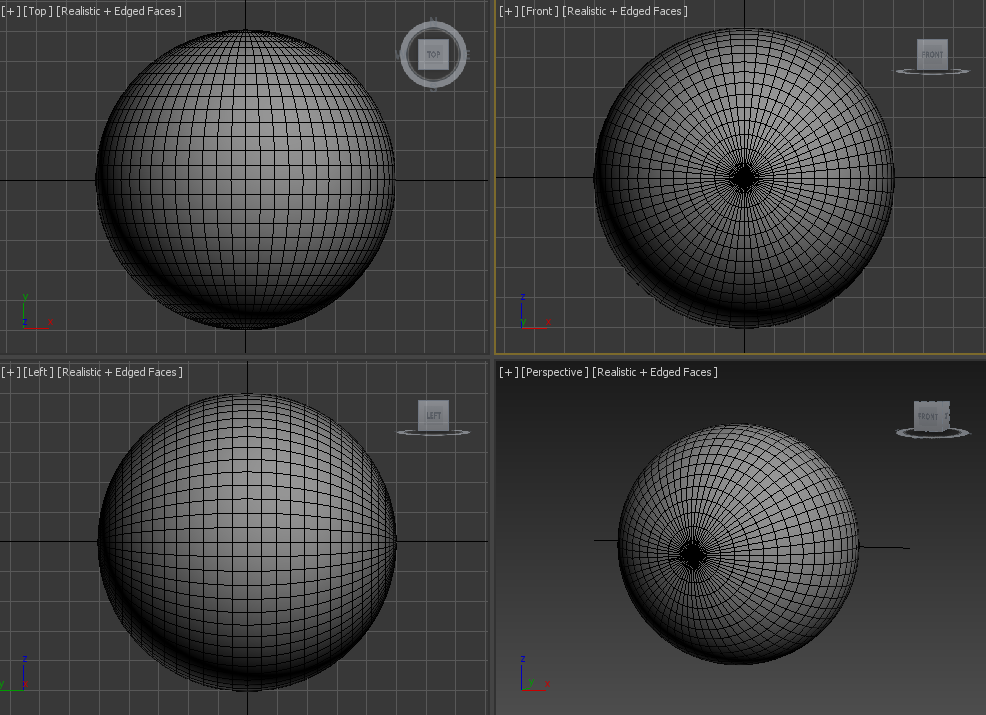
Ok. We have to already to making simple sphere model in 3ds max like this picture at below?
What do we do?
Yes, We must be checking for let we know about parabolic or parabolide
Parabolic lookup texture making technique have a two important thing .
The first is uv segment length between each segments.
Two is more like your have to read and understanding parabolic specification and simplicity theory for parabolide in the world environment effect.
to be continue.....
too much sleepy...
writing progress now....
You could checked nvidia parabolic map reference
ftp://download.nvidia.com/developer/Handheld_SDK/EnvMapping.pdf


Real parabolide texture is generating using raytrace.
But this section is pre generating parabolic uv coordinate with dual ambient texture technique.
 The First create simple box object into 3dsmax at zero axis.
Box size is 50 , 50 , 50

And applying turbosmooth modifier and then applying 5 subdivide values and then applying spherify modifier.
And then next you should be make another sphere object into same scene.
Sphere redius is 21 and segment is 128

Edit uv for the first created object looking below...
 [Picture A ]
But this uv it will be uv normalize this image is just for understanding process theory...
(Left side uv is front and Right side uv is back from turbosmooth iteration valuse is 3)
That is not correct to parabolic reflection theory...
 [Picture B]
It is match to parabolic reflection uv... Can you comparable between pictures A to picture B what they differents?
Parabolic reflection UV have to need preserve ratio for surface segments.


For example if you are need to smoothly surface and smooth uv you should be change to turbosmooth iteration valuse is 5.
 Next step is very important and You have to select all uv point and exclude just outline bound uv point line like this.
And next we using Relax tool with setup option like below...

Comparing before and after at below picture.


Also. another sphere object to same applying process for uv edit and looking below ... that just if the first objects' uv map are not correcting parabolide uv bound to projection uv from second sphere object.
 Ok.that's it all. Now process is done for equipment object for dual parabolic ambient lookup texture making.
And to be next...part of two.
We will be implement to parabolic ambient texture lighting shader.
Thanks.
Game Developer Leegoon copyright all right reserved since 2010.
I'm sure that is too much pre easy.
This technique is really some tweaking by parabolic reflection uv coordinate.
Ok. We have to already to making simple sphere model in 3ds max like this picture at below?
What do we do?
Yes, We must be checking for let we know about parabolic or parabolide
Parabolic lookup texture making technique have a two important thing .
The first is uv segment length between each segments.
Two is more like your have to read and understanding parabolic specification and simplicity theory for parabolide in the world environment effect.
to be continue.....
too much sleepy...
writing progress now....
You could checked nvidia parabolic map reference
ftp://download.nvidia.com/developer/Handheld_SDK/EnvMapping.pdf
Real parabolide texture is generating using raytrace.
But this section is pre generating parabolic uv coordinate with dual ambient texture technique.
Box size is 50 , 50 , 50
And applying turbosmooth modifier and then applying 5 subdivide values and then applying spherify modifier.
And then next you should be make another sphere object into same scene.
Sphere redius is 21 and segment is 128
Edit uv for the first created object looking below...
But this uv it will be uv normalize this image is just for understanding process theory...
(Left side uv is front and Right side uv is back from turbosmooth iteration valuse is 3)
That is not correct to parabolic reflection theory...
It is match to parabolic reflection uv... Can you comparable between pictures A to picture B what they differents?
Parabolic reflection UV have to need preserve ratio for surface segments.
For example if you are need to smoothly surface and smooth uv you should be change to turbosmooth iteration valuse is 5.
And next we using Relax tool with setup option like below...
Comparing before and after at below picture.
Before(Left side)
After(Right side)
Parabolic uv that have to conservation to between each segment distance.
And to be next...part of two.
We will be implement to parabolic ambient texture lighting shader.
Thanks.
Game Developer Leegoon copyright all right reserved since 2010.


Comments
Post a Comment
덧글쓰기 기능 있는거 아시죠? ㅋㅋ